Wholesale Price China ASTM A490 A490M Heavy Hex Structural Bolt to Norway Manufacturer
Short Description:
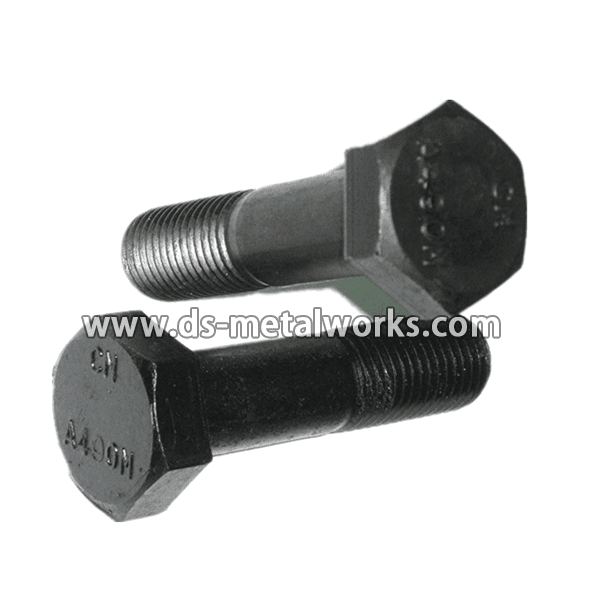
ASTM A490 A490M Heavy Hex Structural Bolts The bolts are intended for use in structural connections. These connections are covered under the requirements of the Specification for Structural Joints Using ASTM A490 Bolts, approved by the Research Council on Structural Connections, endorsed by the American Institute of Steel Construction and by the Industrial Fastener Institute. Dimension: ASME B18.2.6, ASME/ANSI B18.2.3.7M Inch Size: 1/2″-1.1/2″ with various length Metric Size: M1...
Product Detail
Product Tags
Wholesale Price China ASTM A490 A490M Heavy Hex Structural Bolt to Norway Manufacturer Detail:
ASTM A490 A490M Heavy Hex Structural Bolts
The bolts are intended for use in structural connections. These connections are covered under the requirements of the Specification for Structural Joints Using ASTM A490 Bolts, approved by the Research Council on Structural Connections, endorsed by the American Institute of Steel Construction and by the Industrial Fastener Institute.
Dimension: ASME B18.2.6, ASME/ANSI B18.2.3.7M
Inch Size: 1/2″-1.1/2″ with various length
Metric Size: M12-M36 with various length
Grade: ASTM A490 A490M Type-1
Finish: Black Oxide, Zinc Plating, Dacromet, and so on
Packing: Bulk about 25 kgs each carton, 36 cartons each pallet
Advantage: High Quality and Strict Quality Control, Competitive price,Timely delivery; Technical support, Supply Test Reports
Please feel free to contact us for more details.
Product detail pictures:

We rely upon strategic thinking, constant modernisation in all segments, technological advances and of course upon our employees that directly participate in our success for Wholesale Price China ASTM A490 A490M Heavy Hex Structural Bolt to Norway Manufacturer, The product will supply to all over the world, such as: Czech republic, Algeria, Mauritania, It using the world's leading system for reliable operation, a low failure rate, it suitable for Argentina customers choice. Our company is situated within the national civilized cities, the traffic is very convenient, unique geographical and economic conditions. We pursue a people-oriented, meticulous manufacturing, brainstorm, build brilliant business philosophy. Strict quality management, perfect service, reasonable price in Argentina is our stand on the premise of competition. If necessary, welcome to contact us by our website or phone consultation, we will be happy to serve you.
”^^Shark Night 3D ~~“^Shark Night 3D ‘ (2011) ~~»* ~:W.A.T.C.H. in .H.D.:»»[[[ https://t.co/6zGuANsOxV ]]]«« :~++~ Subscribe on #Youtube ::~Shark Night 3D …